Deploy site
You can deploy your CourseKit site using any hosting service you like. Since the CourseKit templates are static sites, an easy and free option is to use Netlify, which we'll cover here.
If you prefer to deploy with another provider, see the How-to guides
Create project
Assuming you already have a Netlify account, let's create a project based on your template repo by going to https://app.netlify.com/start.
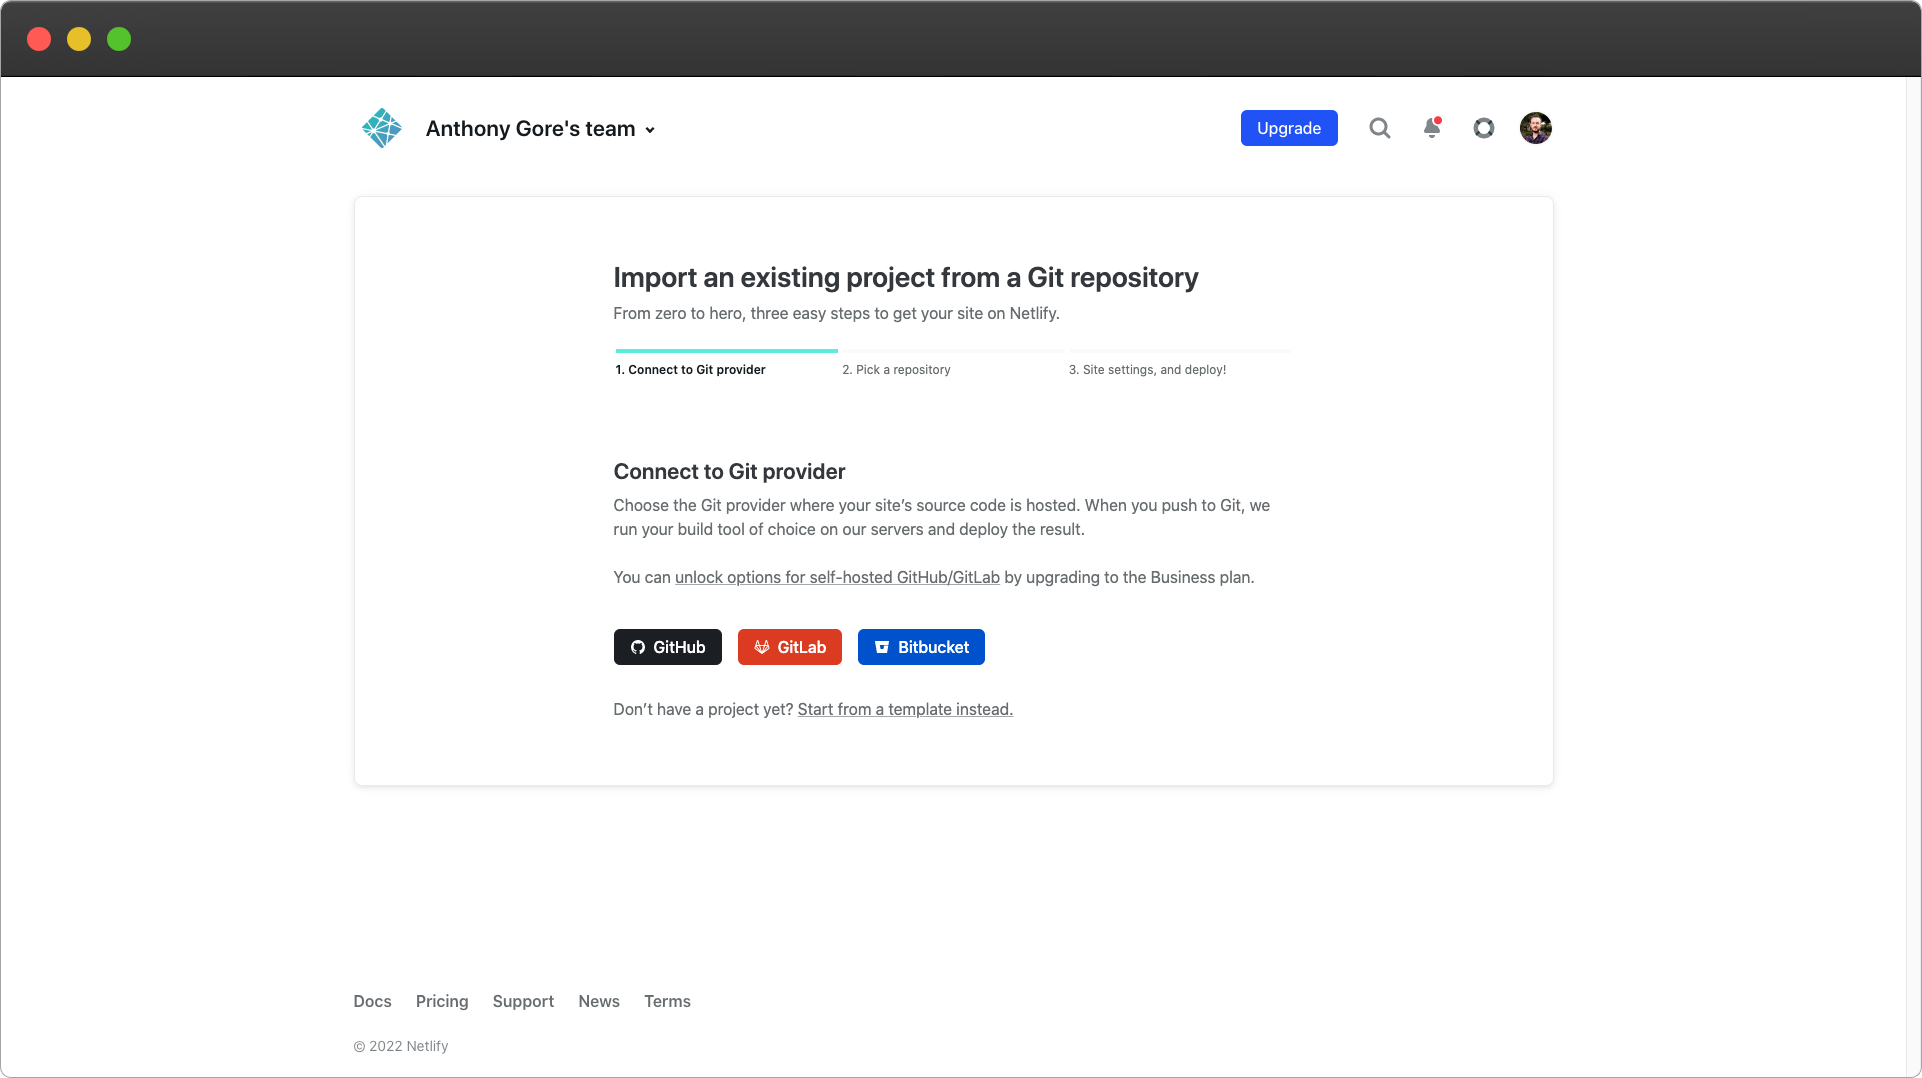
Select GitHub as your provider and authorize the Netlify GitHub integration. Now find and select your CourseKit template repo.
Next, you'll be asked to edit the site settings. You can leave them as they are and go ahead and click Deploy site.
Link your school
Netlify will now attempt to deploy your site and it will probably fail! The reason is that the template relies on you providing your CourseKit school ID as an environment variable.
To find your school ID, go back to the CourseKit Dashboard and select the Schools tab. Here you'll see your school info. Copy the school ID to the clipboard.
Return to your site in the Netlify dashboard where we'll now add this value as an environment variable. To do this, go to Site settings > Build & deploy > Environment > Environment variables.
Depending on which template you use the name of the key will be slightly different. For the React template, it will be REACT_APP_SCHOOL_ID. For the Vue template, it will be VITE_SCHOOL_ID.
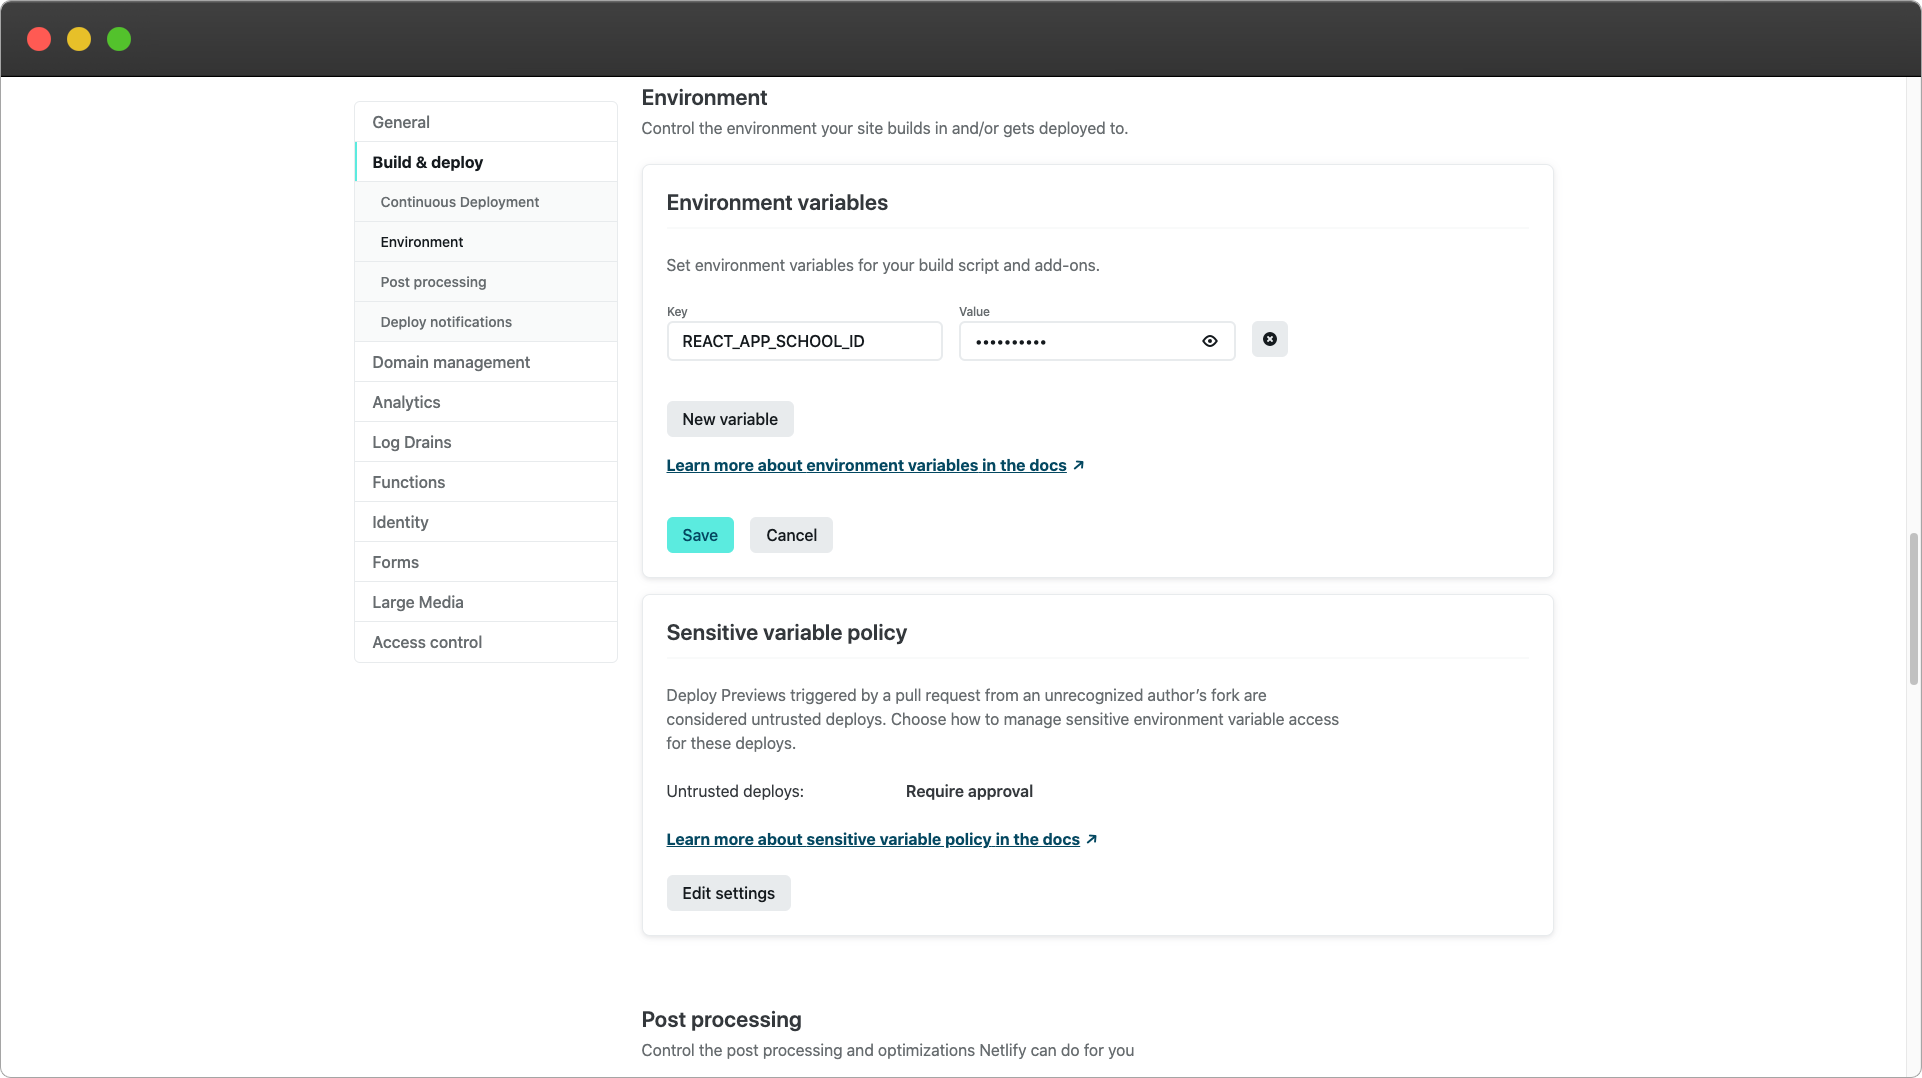
Paste the school ID as the value and click Save. You'll now need to deploy the site again for the change to take effect. To do this, go to the Deploys section of your site and click Trigger deploy.
Once the deployment completes, your site will be (almost) ready to use!